
PBX stands for “Private Branch Exchange”, which is what is referred to as a “Phone Switch”, which “switches” phone calls (inbound and outbound) to user’s extension from external SIP sources. SIP is “Serial Inline Protocol” and is the network protocol that is used to facilitate most PBX calls. In order to effectively use the PBX, you will need to purchase SIP service from a provider.
Setting up a PBX will save you money on monthly phone bills, as SIP providers do not usually charge you monthly other than the purchase of a DID (Phone Number), all service is “use as you go”. The possibilities of PBX integration with your existing systems is never ending.
Let’s start by installing FreePBX by downloading is at this link: FreePBX Download
Spin up the ISO in a VM or physical server and go through the setup wizard. There are not many options here, and most setting will need to be adjusted after the distro has been installed. The only option during the install, other than setting up passwords for user accounts, is the choice of Asterisk version: 13,14, or 15, at the beginning of the install.
Asterisk 13 – Considered the “Stable” Long Term Support release.
Asterisk 14 – Some new features to PJSIP mostly.
Asterisk 15 – Major improvements to how calls are handled in the PBX and added some new features to WebRTC.
I chose FreePBX 14 with Asterisk 15 for this install on a VM in ProxMox. You can choose any option that suits your needs, this how-to will cover all versions of Asterisk in this distro.
Initial Install
1.
Make a VM in your Virtual Environment that will suit your needs:
- I made one for home use using the following values:
- CPU = 2 Cores
- Memory = 2048
- Disk = VirtIO 50G
- Network = VirtIO 1 Interface
- CD = FreePBX 14 Distro
2.
Fire up the VM and install FreePBX through the console:
- Choose your version of Asterisk.
- Set your ROOT password.
- Reboot the server after the install finishes.
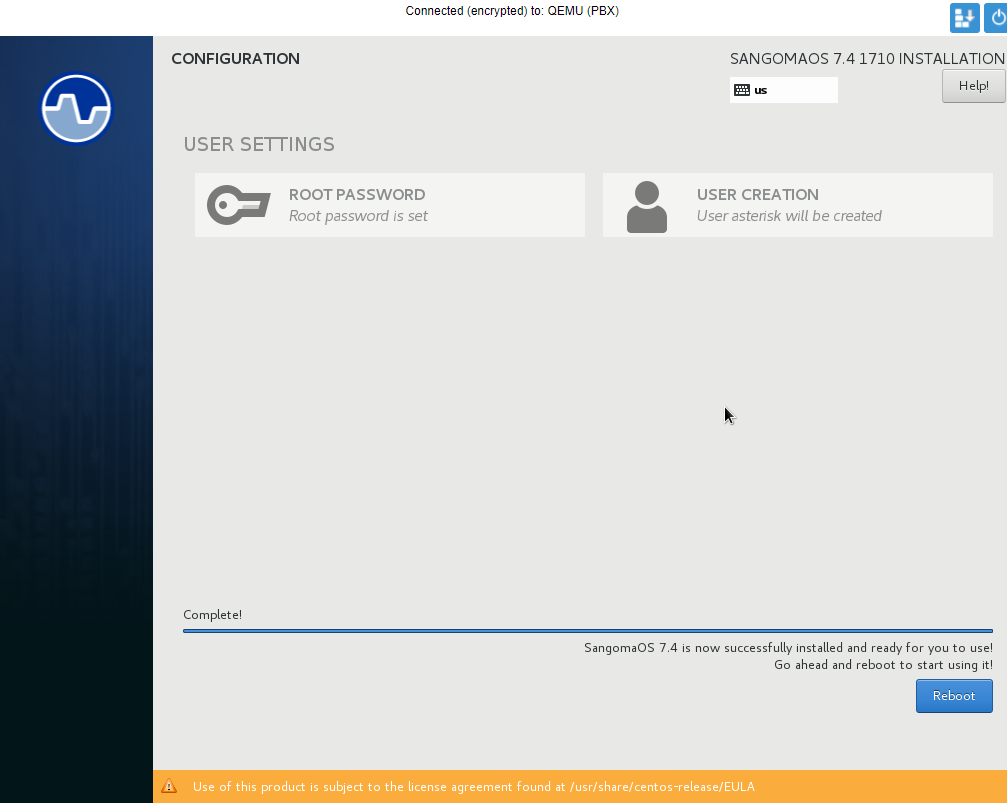
3.
Log into the Console of your VM after reboot and find the IP of your PBX GUI, it will be displayed after you log in.

4.
Go to http://<the IP in the console> and go through the initial setup wizard:
- Username: User you will log into the GUI with.
- Password: Password for this user.
- Admin Email address: email address to send notifications to.

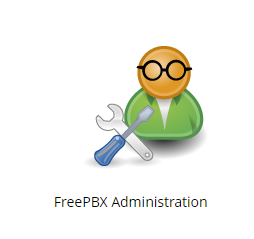
5.
Once the website reloads, click on the FreePBX Administration icon.
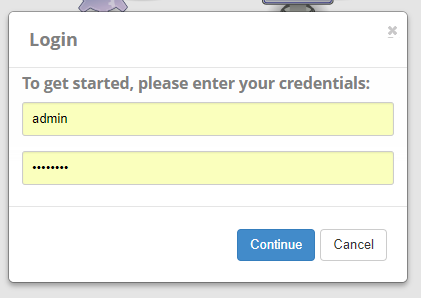
6.
Log in with the user you created in Step 4.
7.
Select Chan_Sip Info at the right and see if your trunk has Registered with the SIP provider:

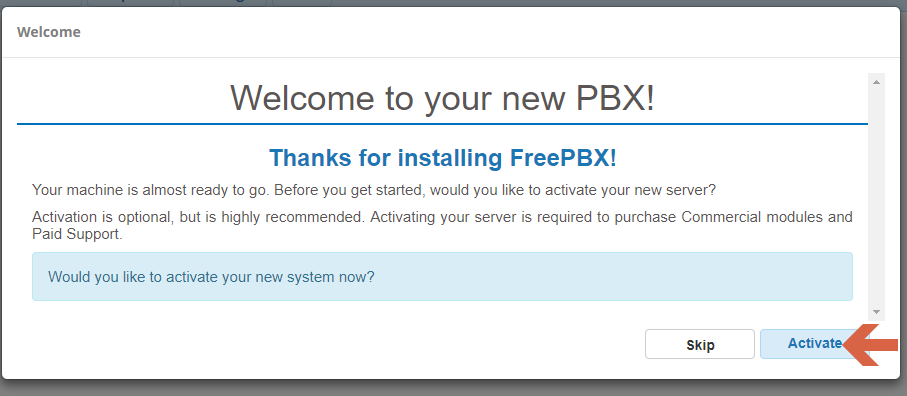
8.
Activate the system by clicking Activate at the next screen:
9.
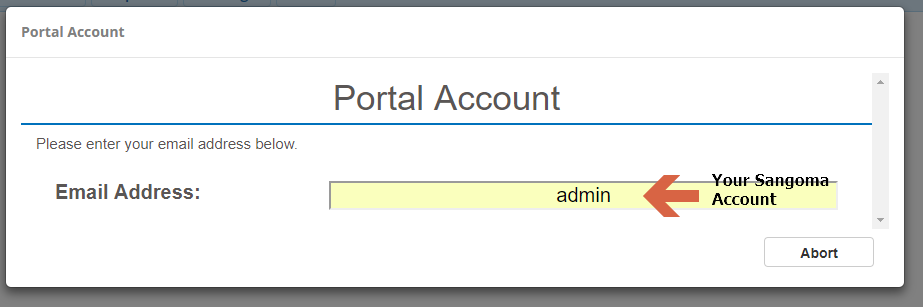
Enter your email address, if you already have a Sangoma account, it will automatically pick up on this and give you options to re-activate an existing install:
Fill in any account information:
- Email Address: This is your Sangoma account user name.
- Your Name: Obvious
- Phone Number and Alternate Phone Number
- Business Name: (you can make up anything here)
- Address and so on…
10.
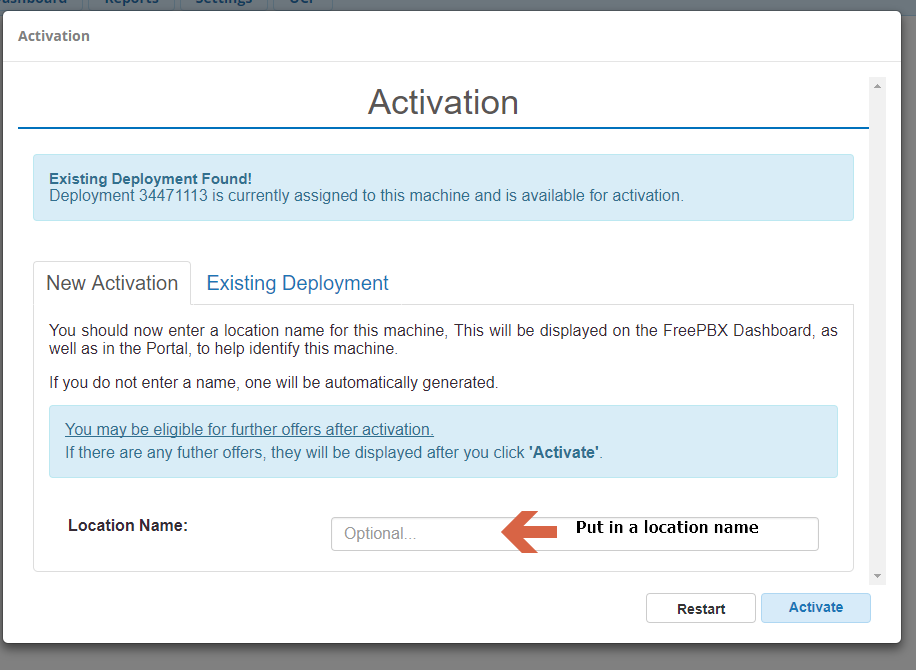
Either choose New Activation if this is your first FreePBX build, or Existing Deployment if you want to use a previous build.
- New Activation:
- Location Name: Put in a location name. I use the address of the build.
- Click Activate when done.
- Existing Deployment:
- Click on Deployment ID.
- Click Activate when done.
11.
Select the default locals of the PBX (change as needed, defaults were fine for me).
Click Submit when done.

12.
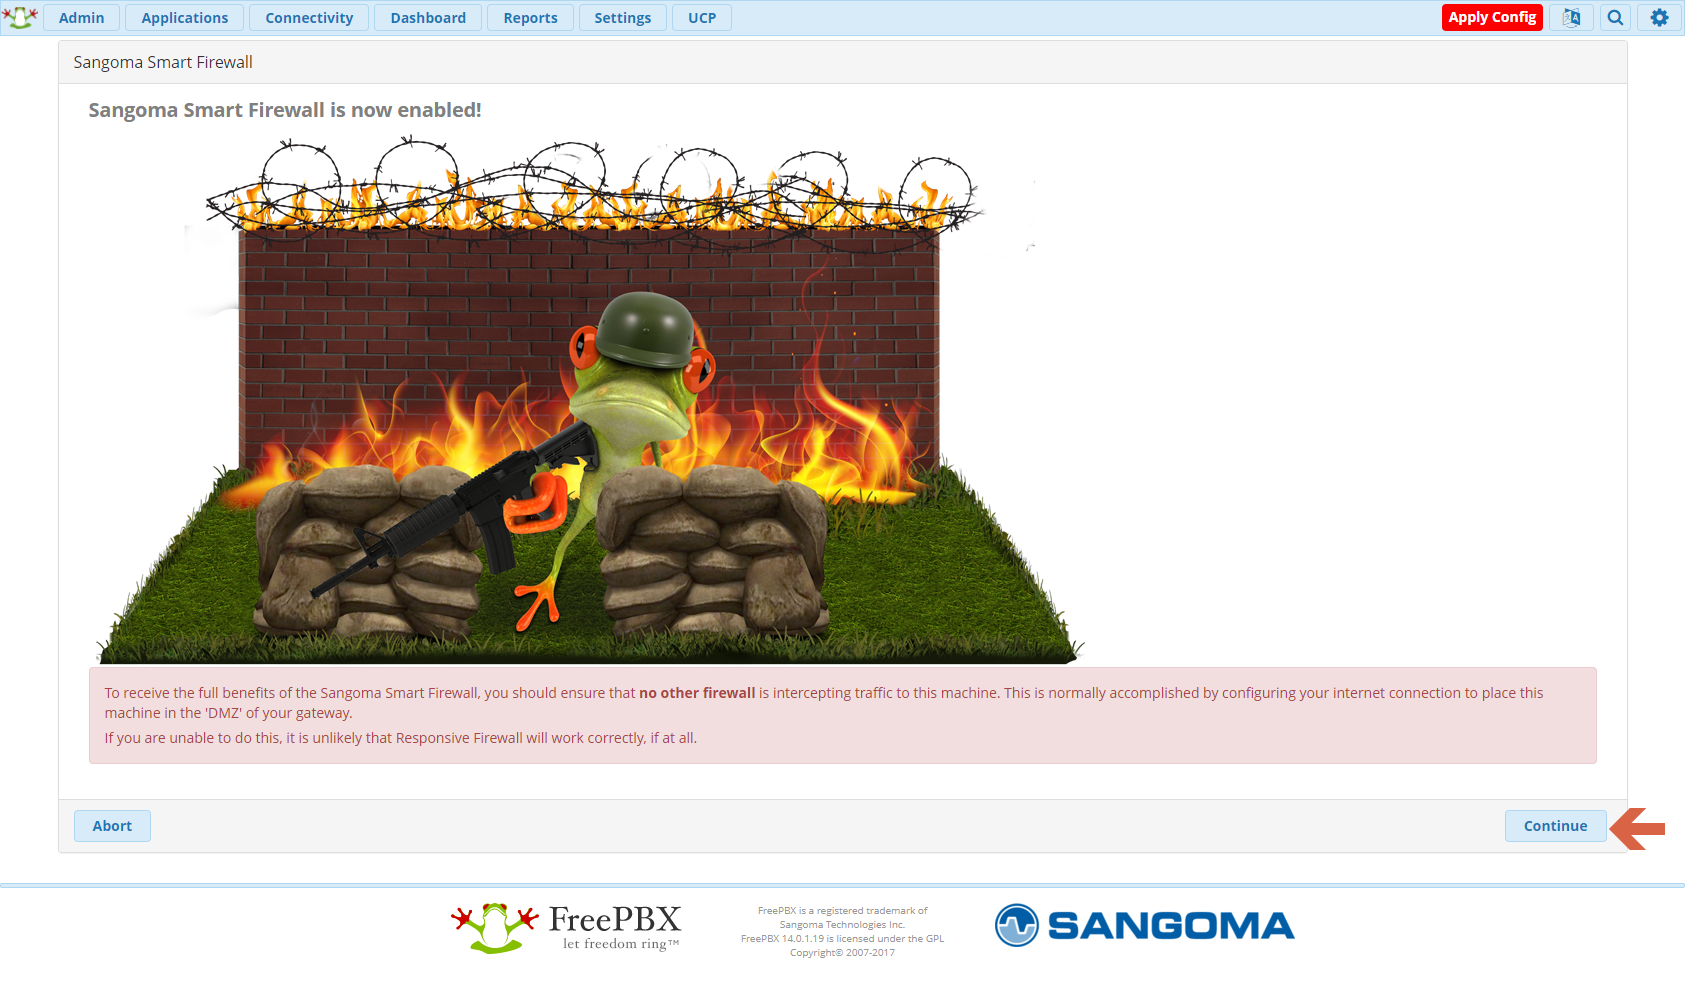
Click Continue on the Sangoma Smart Firewall setup:
- Next on the next screen.
- Yes for “Should the client you’re using be trusted?”
- Yes for “Should your current network be trusted?”
- Yes for “Enable Responsive Firewall?”
- No for “Automatically configure Asterisk IP Settings?”
- Continue for the Advertisements.
- Submit at the last screen.
Change The IP To A Static IP
Let's change the DHCP IP address we are using to a Static IP. This will save a lot of grief down the road.
1.
Log into your PBX.
2.
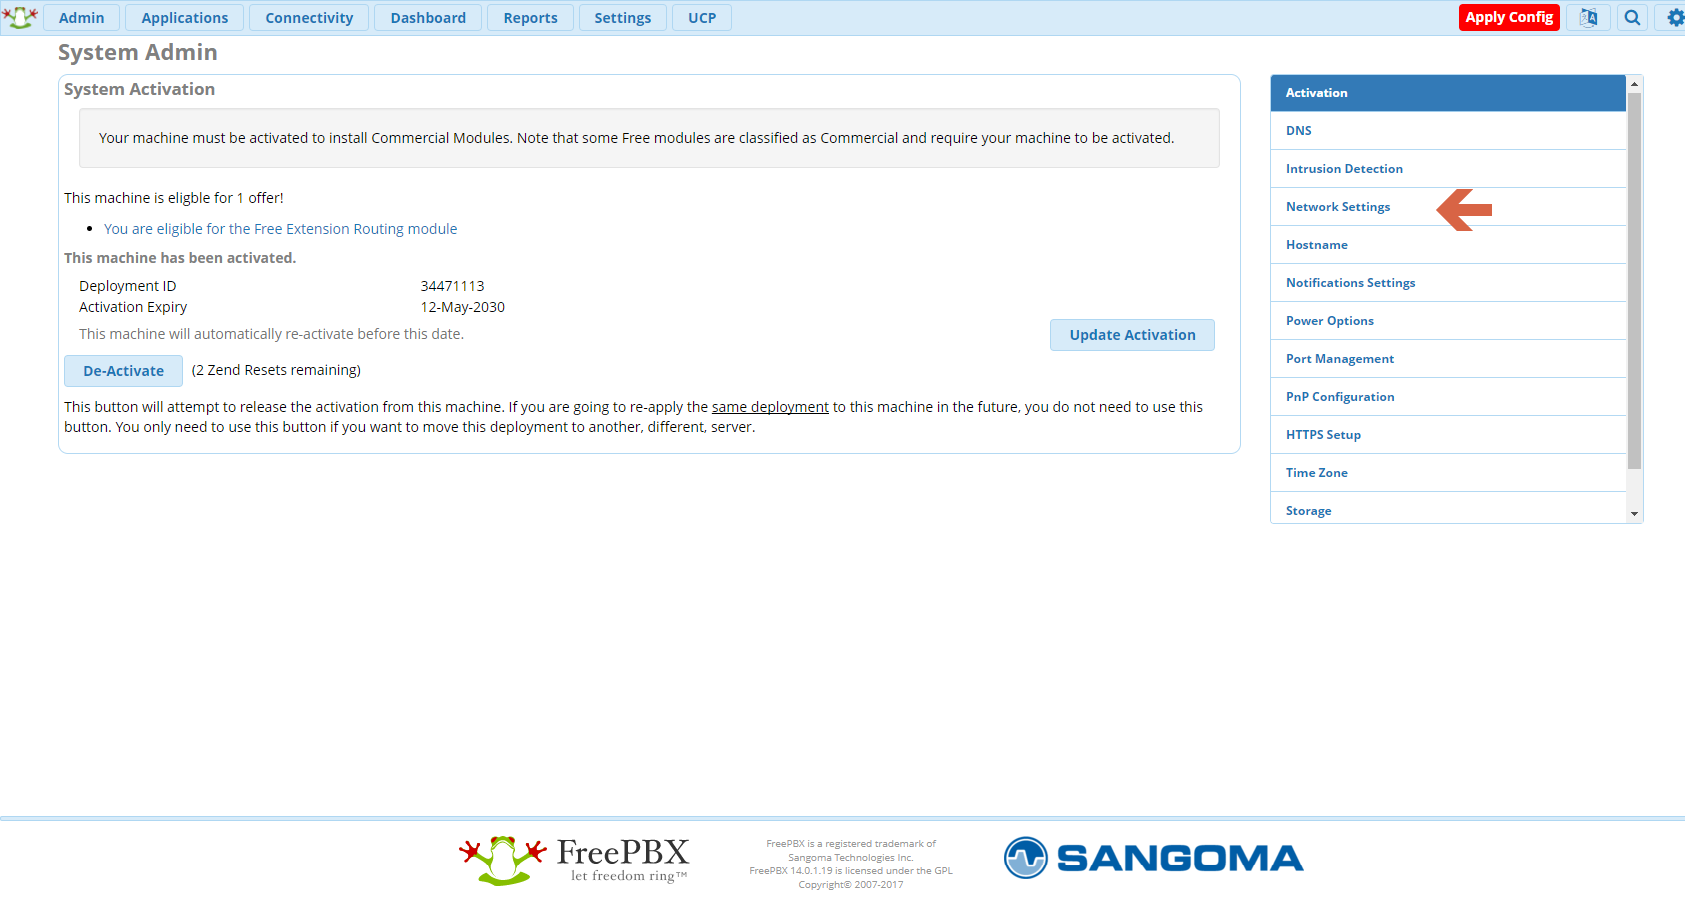
Go to Admin / System Admin and click Network Settings on the right.
3.
Change the following:
- IP Assignment: Static
- Static IP: <Enter a static IP address>
- Netmask: <Enter your subnet mask>
- Gateway: <Enter the IP of your Router>
- Click Save Interface when done.

4.
Now the page will seem to be not responsive, that’s because we just change the IP of the PBX.
Go to http://<new IP> in your browser to get back to the FreePBX Administration page.
DNS, Hostname and Time Zone
1.
Log into your PBX.
2.
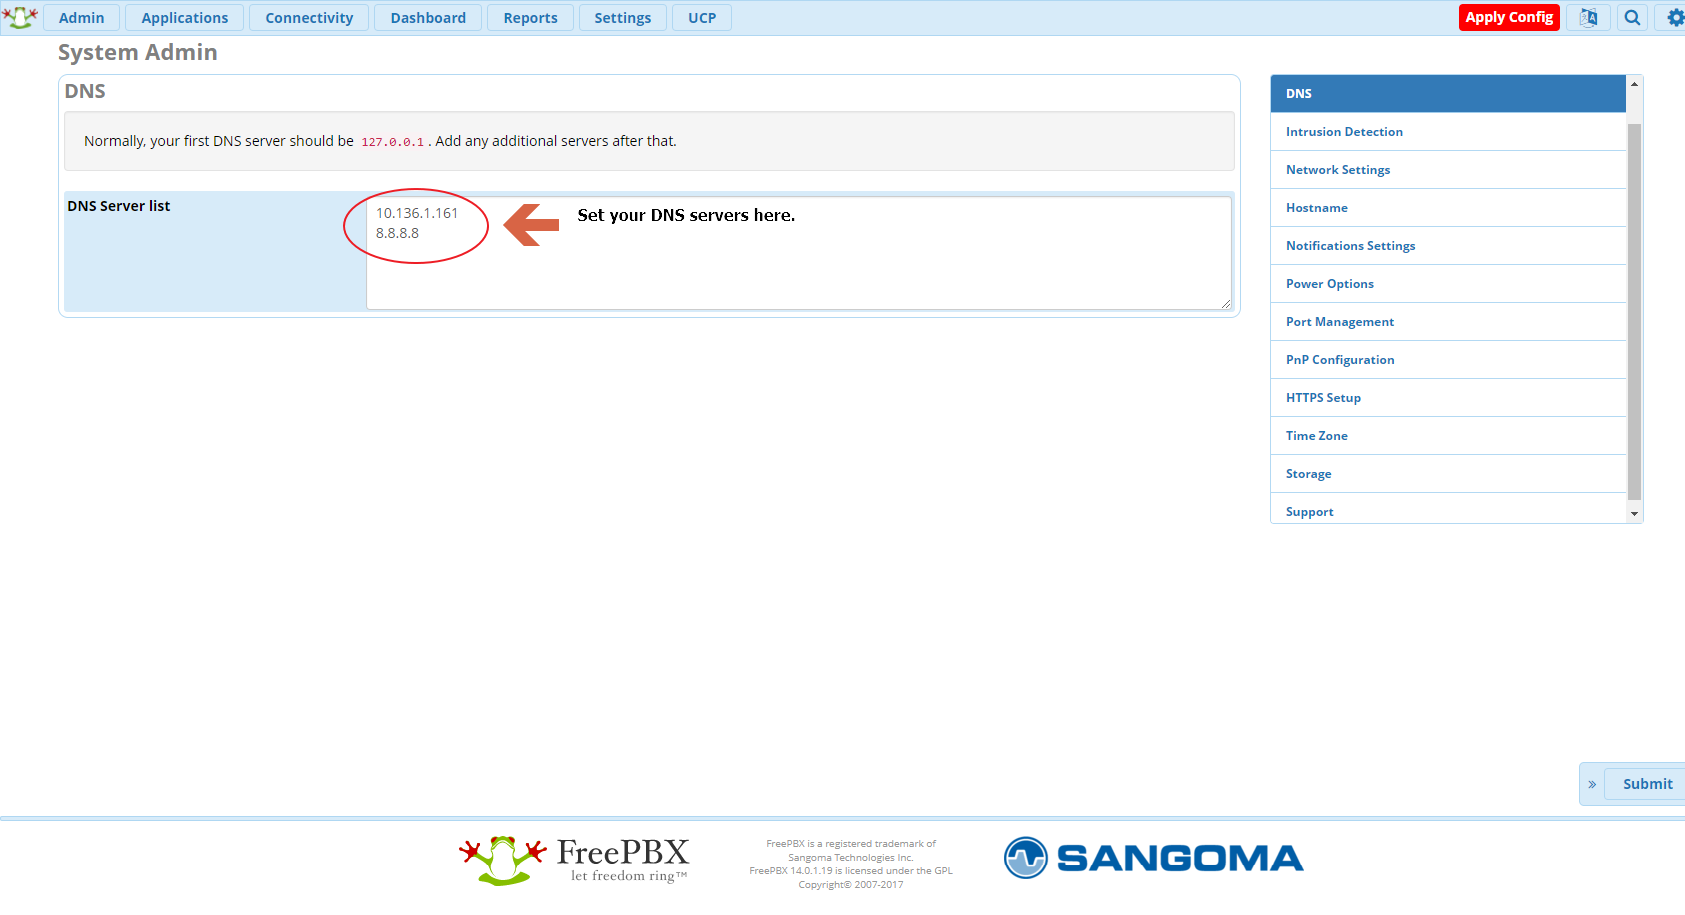
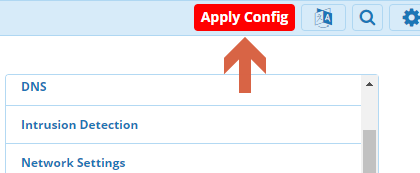
Go to Admin / System Admin and click DNS at the right:
- DNS Server List: <Enter your DNS server IP's>
- Click Submit when done.
3.
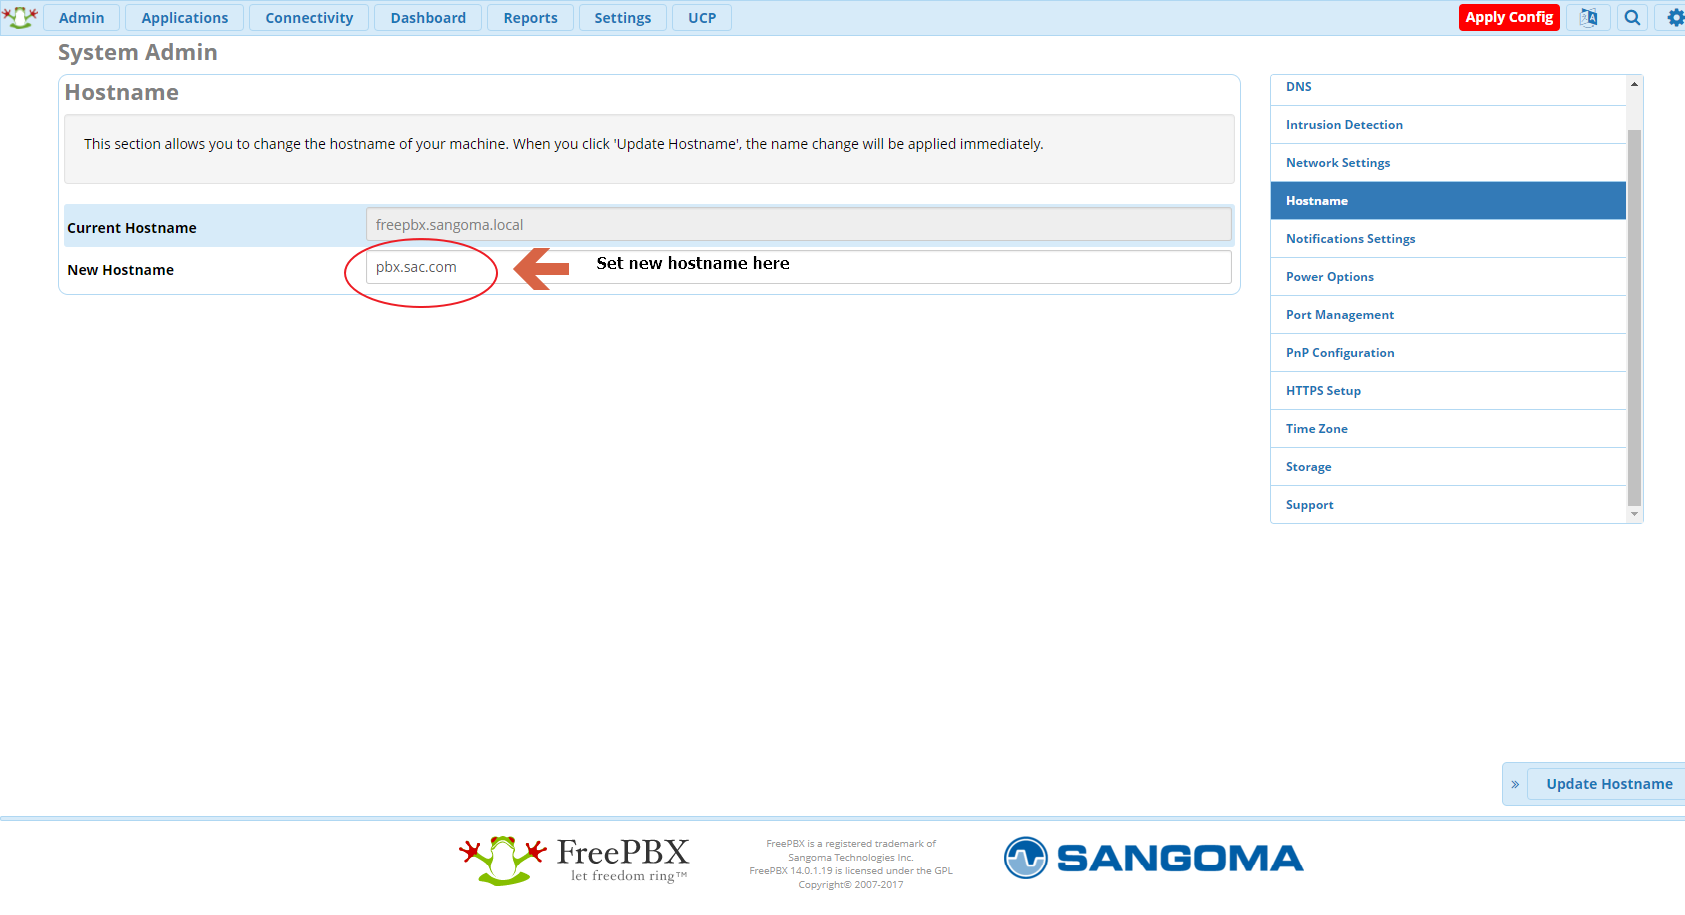
Now click Hostname on the right:
- New Hostname: <Enter your host name>.com
- Click Submit when done.
4.
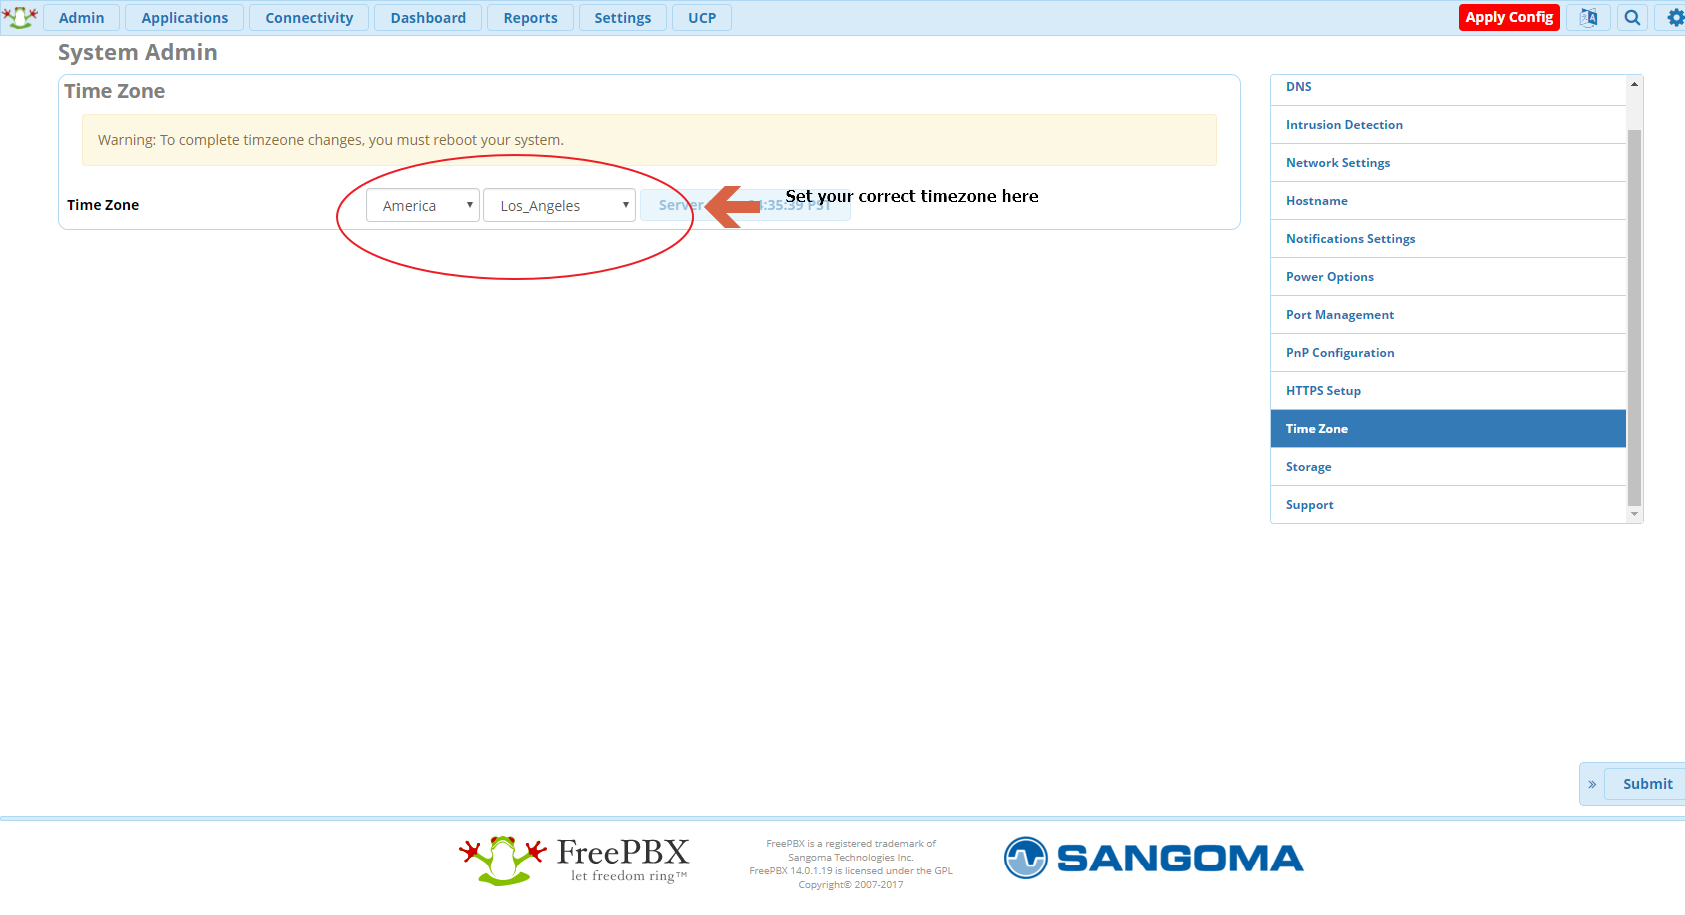
Click on Time Zone on the right:
- Time Zone: <Select Country> <Select City>
- Click Submit when done.
5.
Now click Apply Config at the top right of the screen.
Update System
Let's update the system software before we make any further configuration changes.
1.
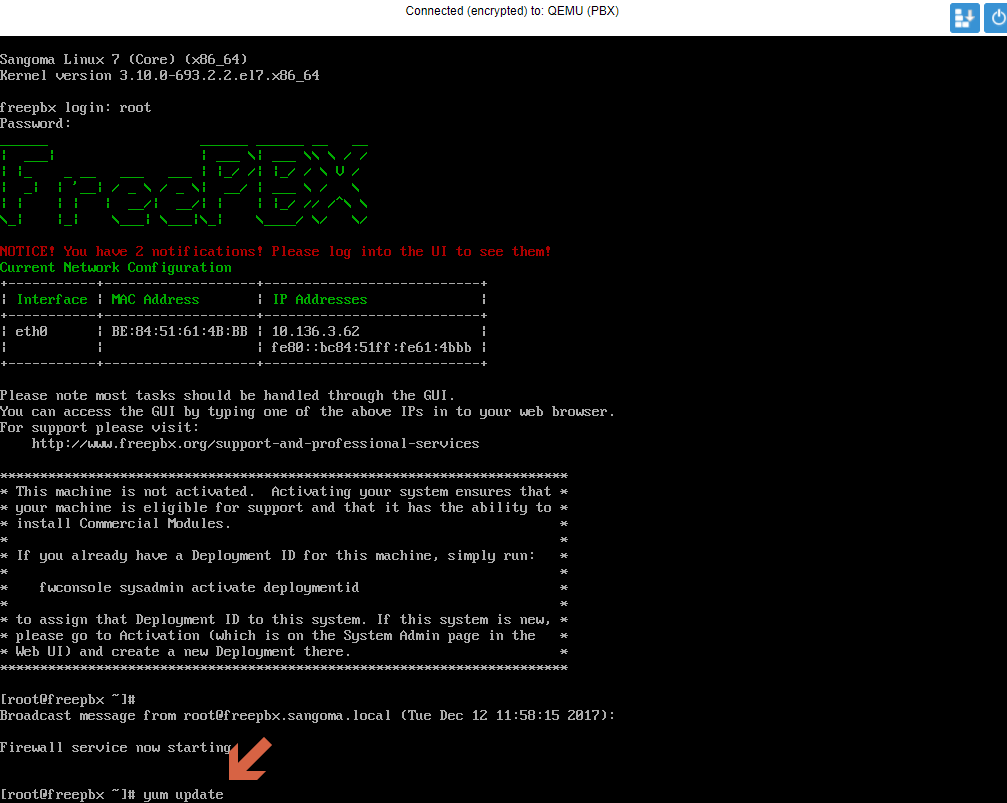
Log into your PBX VM's console.
2.
Type in the "yum -y update" and press enter:
yum -y update
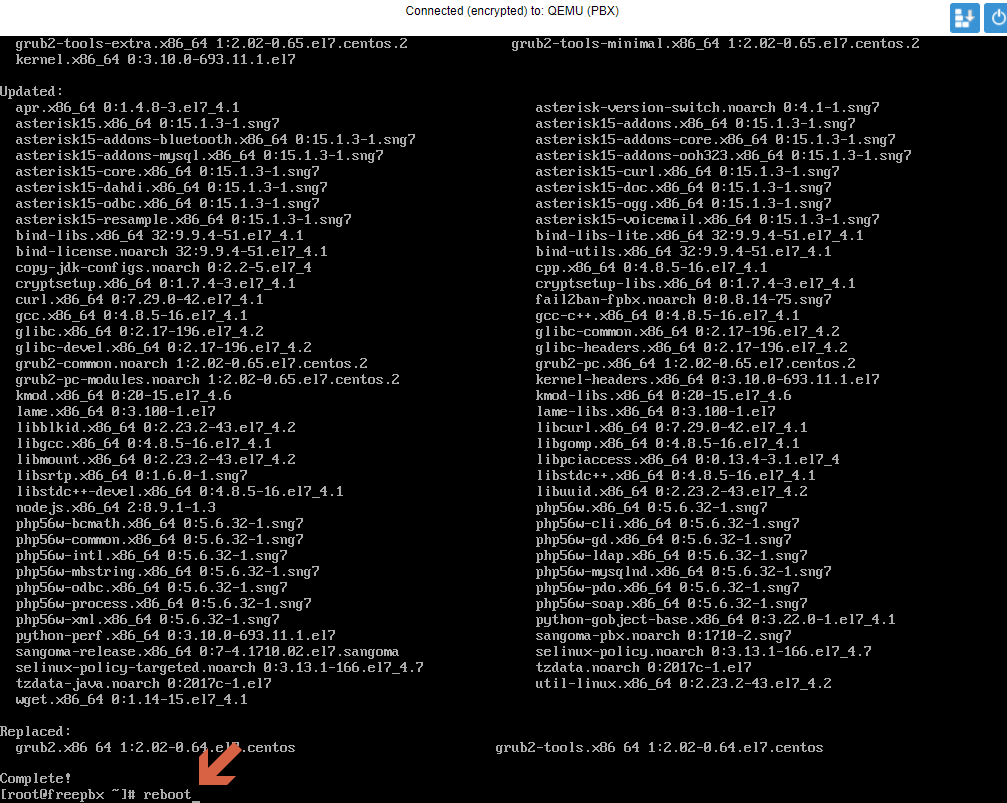
3.
When the updates are completed, type "reboot" on the console are hit enter.
reboot
OK, we are now set to configure networking. We’ll tackle that in the next post.